Configure a Raspberry Pi as a print server for Dymo label printers
guy who wrote this
Johnathan Lyman
published
November 9th, 2019
words
785
This seemed like an odd article to post after nearly 11 months of blog inactivity, but it’s a problem I had to solve on my own today and felt it necessary to write this. Other Internet-based sources I consulted ended up only being partially correct so this is ultimately a combination of all the correct pieces of information that exist online.
I’m going to assume you have a Raspberry Pi (I’m using the Pi 3B+) already set up and connected to your network.
Parts:
Part 1: Install and configure CUPS
This is relatively easy and only requires a few steps.
- Ensure your package repository information is up to date, then download and install cups:
sudo apt-get update
sudo apt-get install cups- Once installed, open
/etc/cups/cupsd.confand make the following changes:
…change the listen configuration to listen globally on port 631…
# Only listen for connections from the local machine.
Port 631
…and update the <Location> configurations to allow local user access…
<Location />
# Restrict access to the server...
Order allow,deny
Allow @local
</Location>

<Location /admin>
# Restrict access to the admin pages...
Order allow,deny
Allow @local
</Location>

<Location /admin/conf>
AuthType Default
Require user @SYSTEM

# Restrict access to the configuration files...
Order allow,deny
Allow @local
</Location>- Add your Pi’s user to the
lpadminuser group:
sudo usermod -a -G lpadmin pi(there are alternative ways to handle this, like change which user group CUPS should consider properly allowed to make printer changes, but in all likelihood, this’ll be sufficient.)
- Restart CUPS
sudo service cups restartPart 2: Install Dymo Printer Drivers
This is the part where I got stuck. Most documentation will point you to the official download, but during the install process, I received tons of errors and had to back out of it.
Preferred method
- Install the
printer-drivers-dymopackage:
sudo apt-get install printer-driver-dymoAlternative method
Alternatively, you can follow the below steps to download and compile manually, but I couldn’t get this to work properly. YMMV.
-
Download the linux drivers from dymo onto your Pi.
-
Decompress them with
tarand enter the directory:
tar -zxf dymo-cups-drivers-1.4.0.tar.gz
cd dymo-cups-drivers-1.4.0.5- Configure and install the drivers:
sudo ./configure
sudo make
sudo make install
NOTE: During the ./configure step, if you receive this error:
configure: error: Can't find cups library…you’ll need to point the configure script to the location of the CUPS server folder, as it was unable to find it on its own. If you installed CUPS via apt, it’s probably at /usr/lib/cups so re-run the command like so:
sudo cups_serverbindir='/usr/lib/cups' ./configureIf it still doesn’t work, you’re missing a couple fundamental libraries. Go ahead and install those:
sudo apt-get install libcups2-dev libcupsimage2-devPart 3: Add the Dymo printer to CUPS
With CUPS set up and your printer (hopefully) already plugged in–if not, make that happen–access the CUPS admin interface at:
https://localhost:631/adminYour browser will probably complain about the SSL certificate. Skip through that, if necessary. You’ll land on a page that looks something like this:
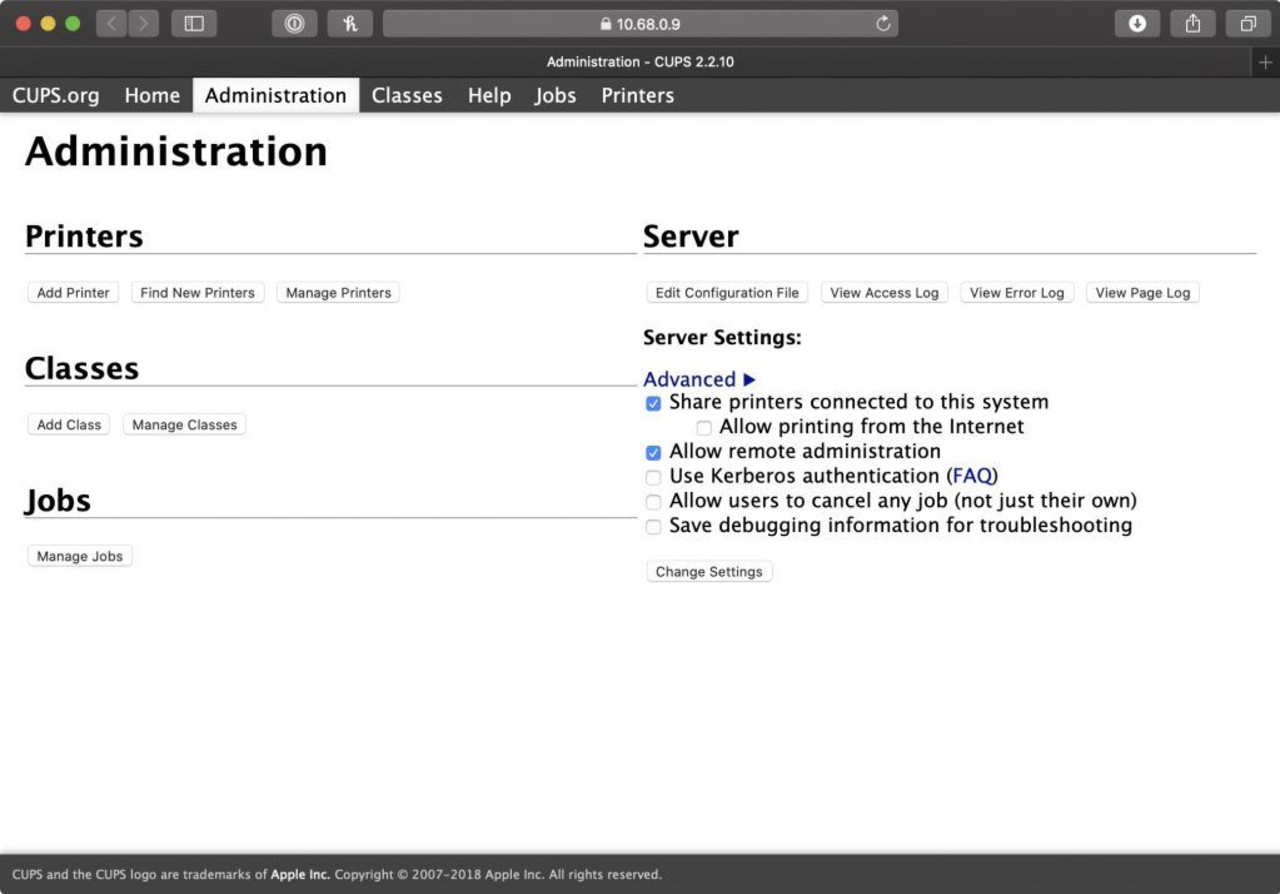
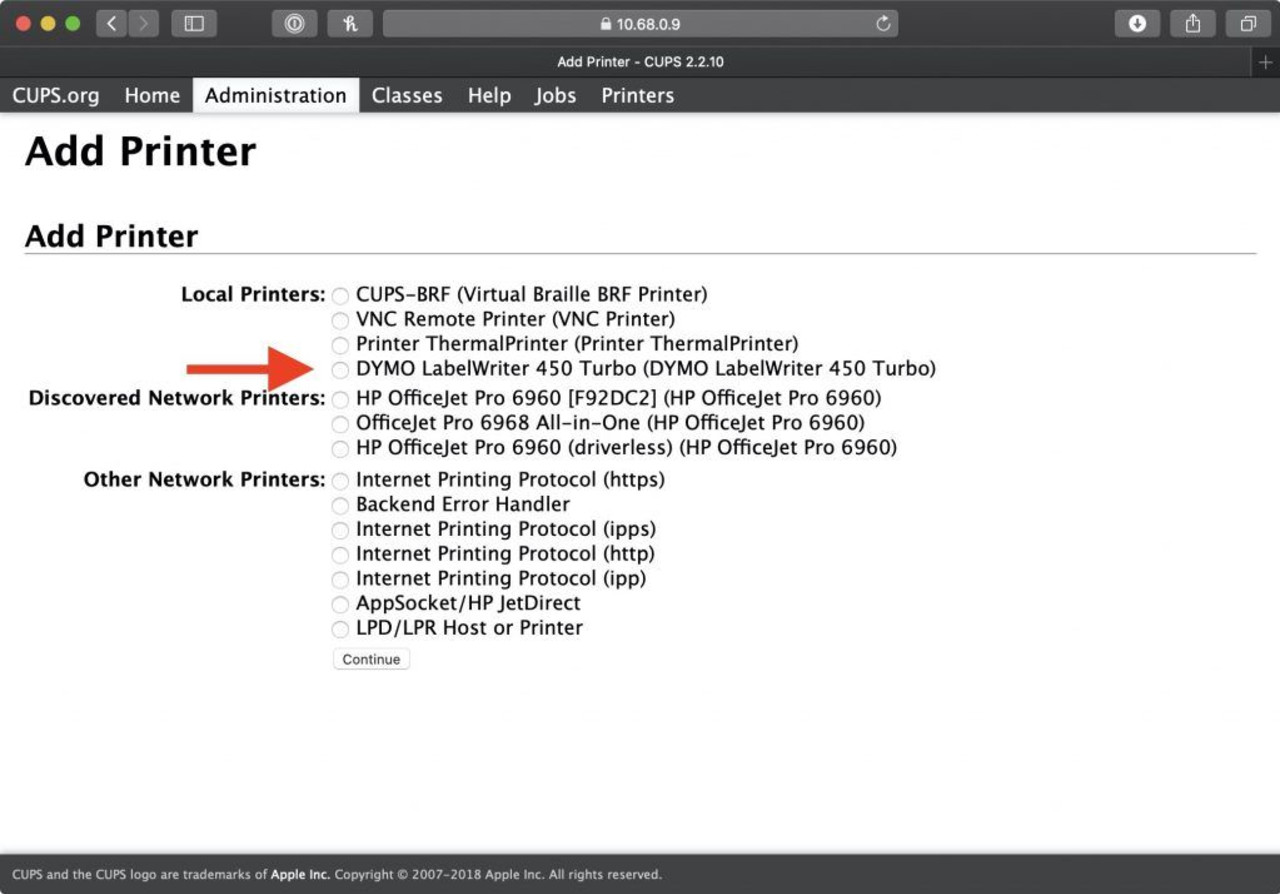
- Click the Add Printer button under the Printers section. Select the Dymo printer and click Continue.
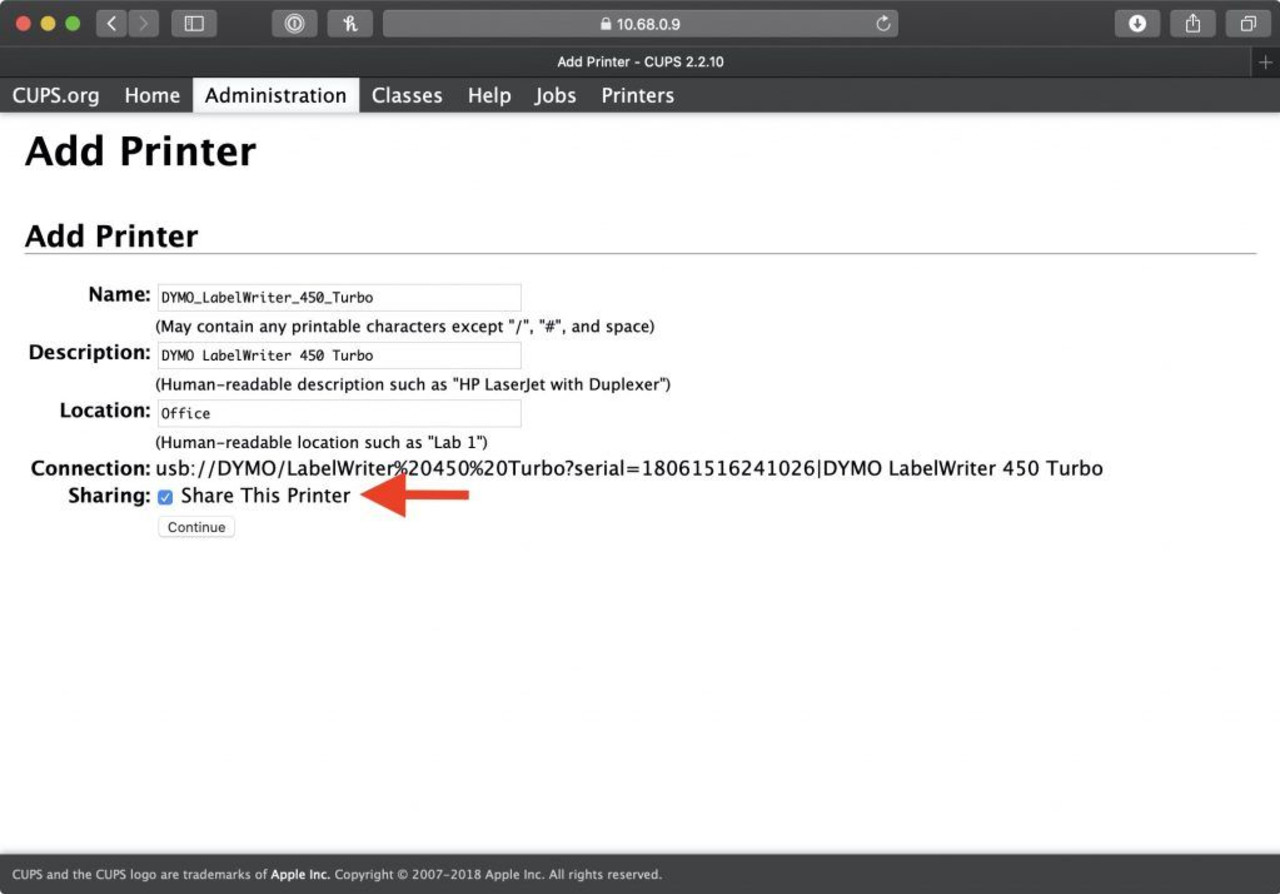
- Fill in the fields as you see fit and make sure to check Share This Printer before clicking Continue :
If everything went according to plan in Part 2, the relevant drivers should appear, with the specific printer at the top of the list.
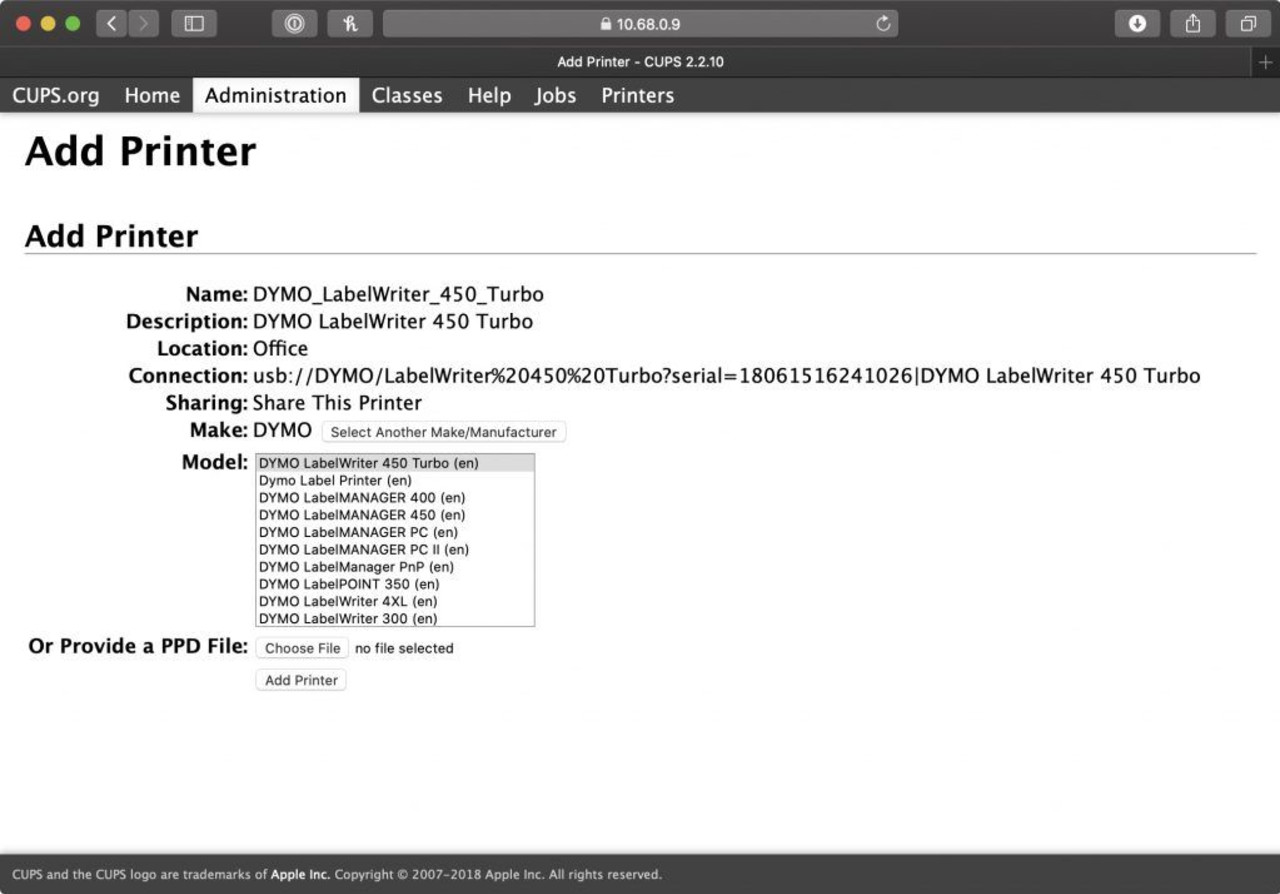
If that’s the case, leave everything as is and click Add Printer.
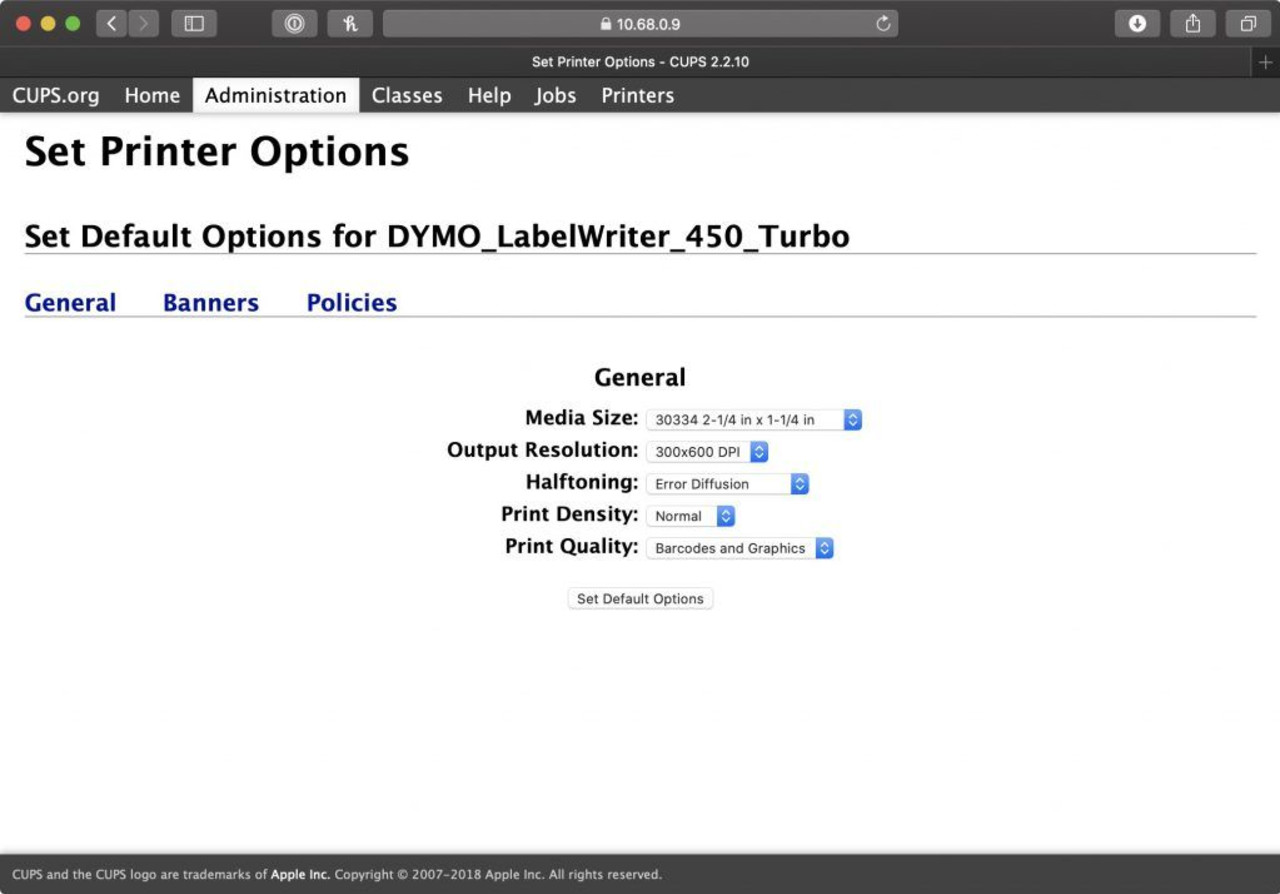
Lastly, and optionally, set some default print settings and wrap up the setup by clicking Set Default Options :
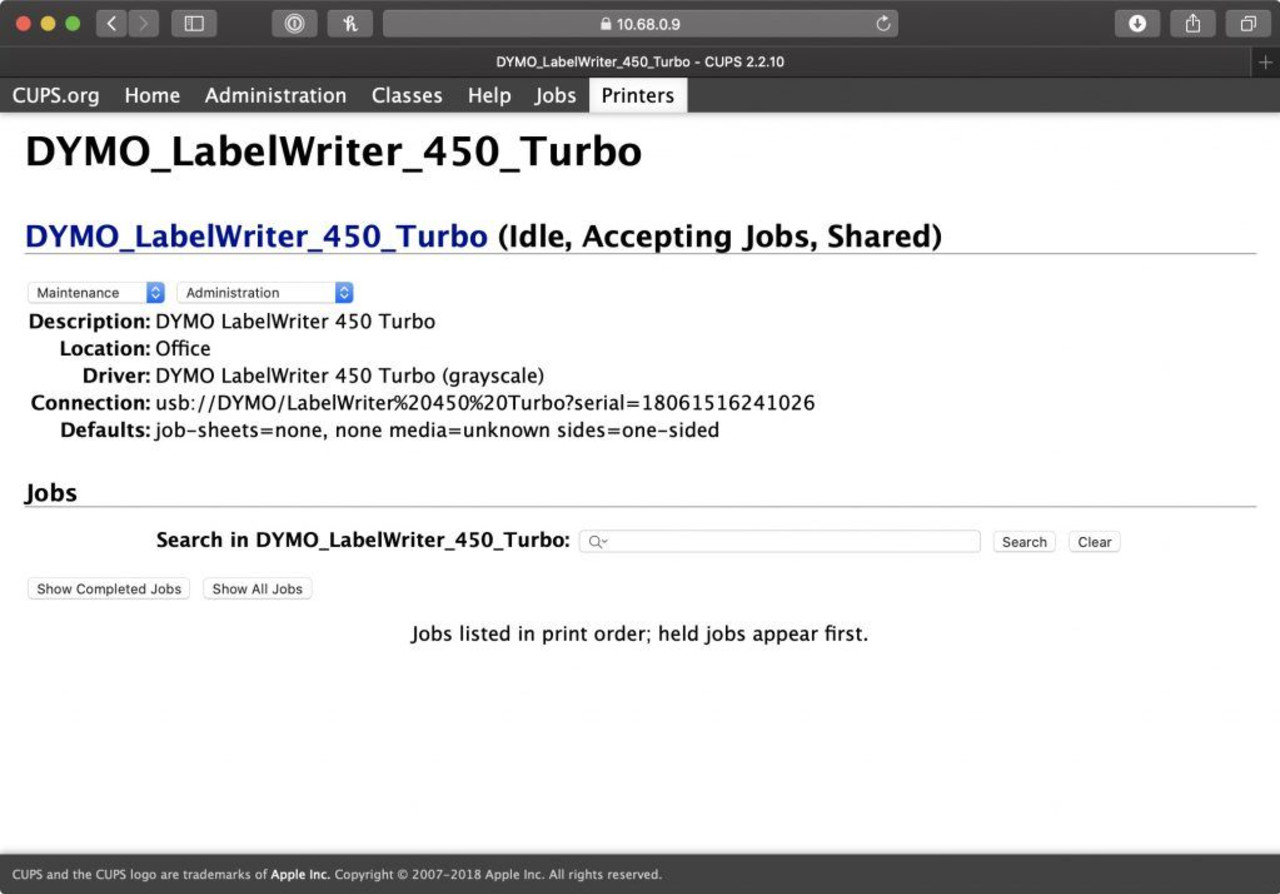
The printer should be set and ready to go, and visible from the CUPS admin page:
Conclusion
After doing this for the third time now I’ve found myself having to hack through some component of the printer driver process, save for this most recent effort (what I’ve documented in this post). I highly recommend doing everything via the package manager if you can help it. What made me think to include that as an option was noticing the version ofdymo-cups-drivers in the Ubuntu source repo was newer than what Dymo itself was offering. That version was also used to build printer-driver-dymo. When the metaphorical lightbulb came on, I realized this was probably a solution to my compile struggles.